Extensions

Are you new to extensions?
Hair extensions can offer so much versatility. I think for most people, when they think of extensions, they only think of long mermaid hair. And while that certainly is a possibility, there are so many beautiful and practical ways to utilize extensions to solve some of our most common hair problems.
Hair extensions aren’t just reserved for those who are young, those who have lots of expendable income, or those who are high maintenance. The possibilities that are available now can be customized to meet a maintenance schedule and budget that works well for you.
I’m so proud to have been educated and certified by Halocouture Extensions and for Aundrea Baisley Beauty to be a retail location for their beautiful selection of extension hairpieces. They have a beautiful history in the hair industry and remain a gold standard, when it comes to the quality of their hair. For years, I’ve used and been familiar with their Original Halo hairpieces but have been so thrilled to provide additional solutions through their expanded catalog of items they produce.
If you’re interested in what any of this could look like for you, click HERE to schedule a no-pressure consultation. We’ll go over, in person, all of the options and I can show you examples of the hair for you to touch, see, and try on. After our consultation, I’ll send you a detailed email of cost options, or with installed methods, what a maintenance schedule could look like for you, including all the costs involved. This will help you see what options could look like for you specifically and to see how this could fit into your budget. I know it sounds intimidating, but trust me when I say it may be more attainable than you think!
Scroll down to read more about the extension services and hairpieces that I provide!
The Original & Layered Halo
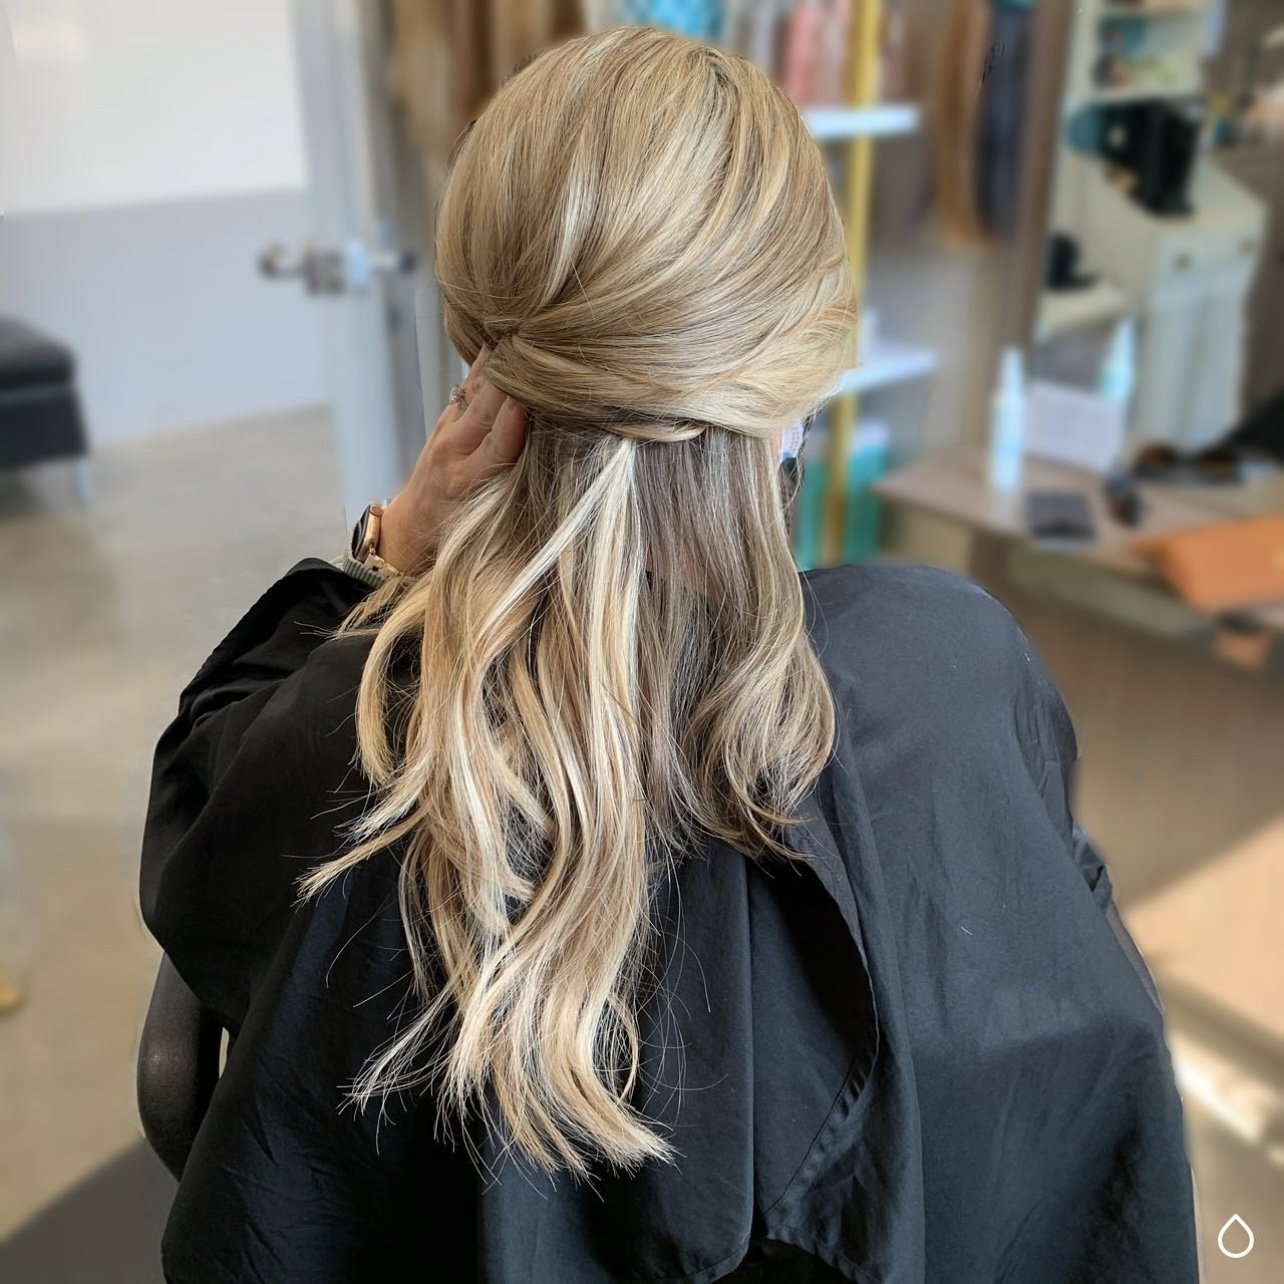
Halocouture revolutionized the world of extensions with The Original Halo and The Layered Halo. Designed with comfort in mind, the easy application of the HALO® will transform your hair in a matter of seconds. This innovative extension is non-damaging, virtually undetectable, and allows the ease of extensions without the maintenance of installed extensions. These pieces are used all the time for weddings, for special events, or “just because”.
So, what’s the difference between the two styles? Simply, The Layered Halo has more hair. If you have thicker hair, The Layered Halo may be your best bet. It has more hair wefts packed into the hairpiece to help match your hair’s density when adding extra length. The Original has worked really well on all hair thicknesses for many years, but now we have both options when choosing the Halo that will work best for your hair. I have demo pieces of most lengths that they have, in Layered and Original, and I’d love for you to try one on to see if it’s a good fit for you!
The Original Halo comes in lengths: 12”, 16”, 20”, and 24”. Comes in 30 colors, starts at $340 and increases with added length.
The Layered Halo comes in lengths: 14”, 18”, and 22”. Comes in 30 colors, starts at $470 and increases with added length.
Click HERE to check out this video to see how easy it is to wear The Original or Layered Halo!


The Ponytail
The Ponytail is a unique extension piece, designed to create the long, voluminous ponytail you've always wanted! It easily attaches with a small built-in comb and a section of hair that wraps around to seamlessly conceal your hair tie. The cool thing about this piece is that it seriously doesn’t matter how long your ponytail is, just as long as you can get it in one, because The Ponytail is going to completely wrap around your natural hair ponytail. I had someone order one recently, to make their ponytail look fuller and more polished, suitable in a professional setting. This allowed her to wear her hair up at work because the finished look was full, sleek, and professional. After ordering, if you’d prefer, we can always cut a little bit of length off to have it at a length that you’re more comfortable with.
Comes in 23 colors. $320
Click HERE to check out this video to see how easy it is to wear The Ponytail!


The Bang
The Bang is the newest addition to the Halocouture catalog and can instantly transform your hair style! Placed a half an inch behind the hairline, The Bang comes in one length of 10-12 inches long so it can be customized to achieve the desired bang length and style! This can be perfect if you love the idea of having bangs but just don’t want to commit to them year-round. The Bang is also AMAZING for those of you who have strong growth patterns around your front hairline that prevent you from having a style of bang that you’d love to have.
Comes in 23 colors. $160
Click HERE to check out this video to see how easy it is to wear The Bang!


The Fall
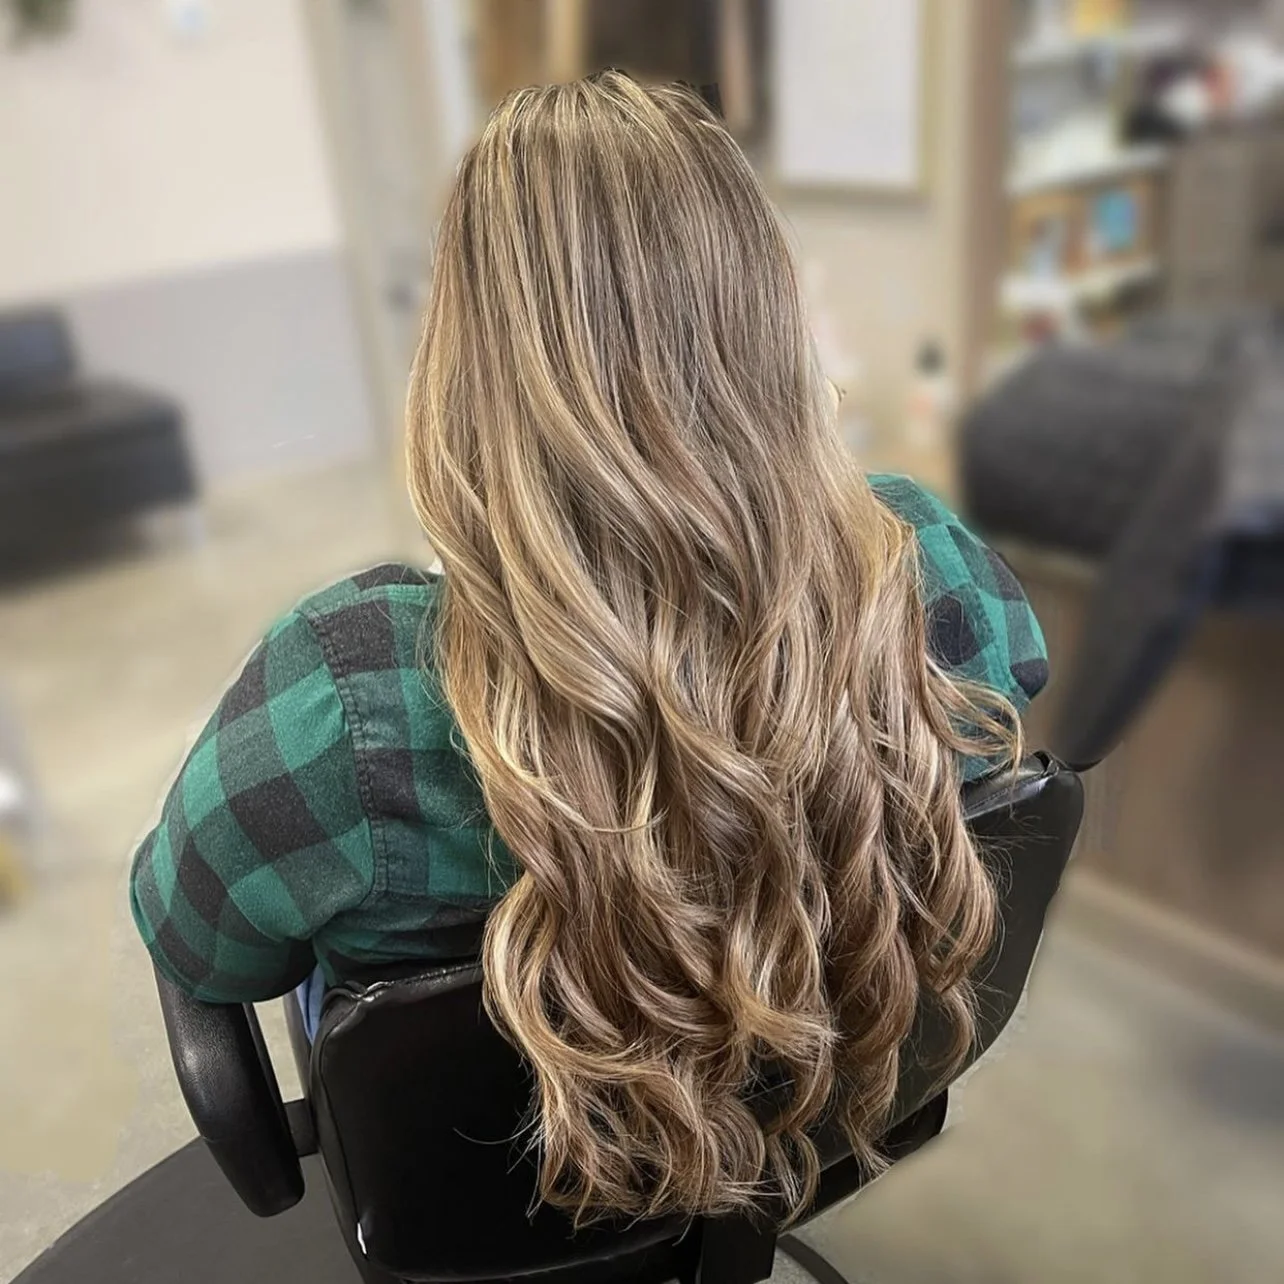
The Fall can easily transform your hair in a matter of seconds! Placed at the crown of the head, The Fall is secured by four comfortable, silicone-coated clips that attach to your natural hair while remaining damage free. The Original Fall hair is hand tied into a breathable weft, which allows it to be redirected to blend with your natural hair. The Fall transforms fine hair into a natural, voluminous look. With the Hybrid Fall the hair is injected into a fabric base which allows the hair to lay flat and can still be directed to blend with your natural hair. It is a mixture of hand-tied and machine tied hair, applied into the fabric base.
Comes in 30 colors. The Hybrid Fall starts at $520. The Original Fall starts at $900.
Click HERE to check out this video to see how easy it is to wear The Fall!
Click HERE to check out this video to show how you can combine The Fall with The Original or Layered Halo to give a full coverage alternative to a wig, while keeping the flexibility of separating the pieces. This combination can be useful to add length and fullness while covering a thinner scalp on top. This combination can also help you hide a shorter haircut, while it’s growing out, allowing your hair to be hidden between the two pieces.


Tape-In Extensions
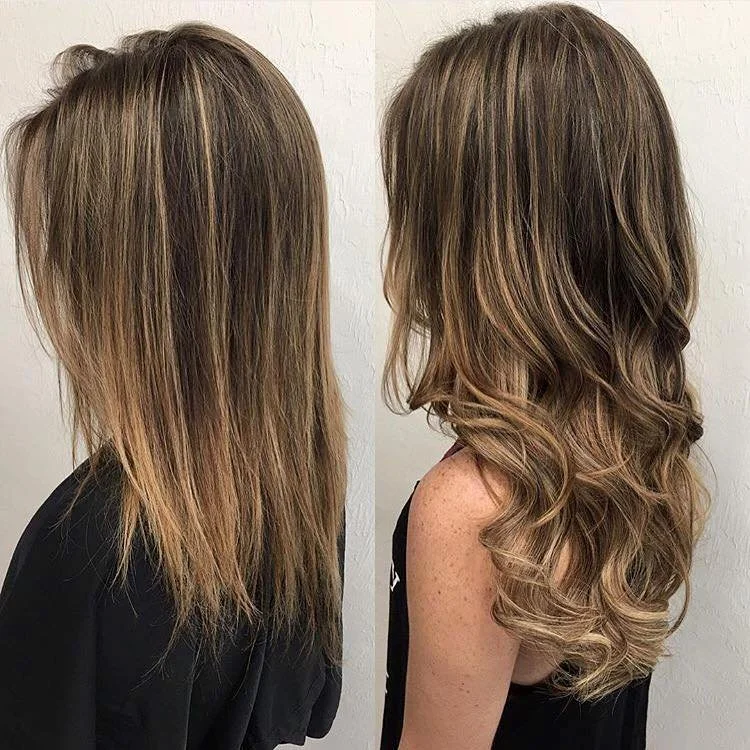
Ok, I’m going to be honest with you. Tape In extensions are not my favorite for an all over extension application. I’ve worn them before, and while I know I’m very tender headed, they’re just not comfortable to wear all throughout your hair. BUT, I believe they do have their place! Here’s the way I love to utilize tape-in extensions. I love to use them as a semi-permanent alternative to highlighting the hair with a traditional chemical application, ESPECIALLY with vivid shades (pink, purple, blue, etc.). They can provide some beautiful highlights when strategically placed, to give the look of highlights without actually chemically altering the hair. If you’re curious if this could be a solution for you, let’s talk! Tape-in Extensions are secured by a non-slip, medical grade adhesive. The tabs stay locked in place until ready to be moved-up every 6-8 weeks. One pack of Tape-In extensions include 10 pairs (you sandwich a small section of your hair between two pieces). These can be cut in half to create a more narrow piece, allowing for a more blended look or to customize the placement in your hair. Depending on the desired look, you could need 1-2 packs of hair. Hair can be reused multiple times with installation. Typically, hair is replaced with a fresh set every 9-12 months.
Comes in lengths: 12”, 14”, 16”, 18”, 20”, and 22”. Comes in 39 colors, starts at $110/pack (Vivid shades start at $70/pack) and increases with added length. Installation is an additional cost.
Click HERE to check out this video to see how Tape In extensions are installed. This video is showing a full head application, but adding Tape In extensions for scattered highlights would follow a different pattern. This just gives you an idea of how they’re installed so that you have a better idea of how they lay in the hair.


Beaded Row Extensions
Alright, now we’re talking! If I’m honest, I had held off on getting certified to install extensions for a while. Until I found an installation method that was comfortable, provided a believable result, and I knew wouldn’t cause damage to the natural hair, I wasn’t interested.
A suite neighbor that I used to work with, years ago, started offering this extension method on her clients a few years ago and I was FASCINATED! The client was able to go from short to long, instantly, and the hair flowed and moved like natural hair. There wasn’t that tell-tale sign that it was extensions because the hair just blended so well! And, they were able to wear their hair in so many styles. In fact, she always showed a video after each installation, showing how they could put their hair up in a high bun without showing the “evidence” of where they were installed.
Now, honestly, this isn’t method isn’t far off from a longtime popular method of installing extensions, where a weft of hair would be sewn into a hidden cornrow braid at the scalp. Here’s my only hesitation to that method. Braids can be an amazing base to sew hair into, but in some cases, the braids can be so tight at the scalp, and can cause damage to the hair follicle, leading to hair loss. You could also run into the braids slipping, especially in silkier hair textures, making the weft unexpectedly visible in the hair. With the beaded row extension method, a row of silicone-lined beads are attached to the hair, at a safe and comfortable distance from the scalp so that there’s no tension on the hair or scalp. The hair weft is laid right on top of that row of beads and then is sewn through the hair that’s sitting just above the silicone bead. This allows the hair to rest on the beads. And because they’re evenly spaced out in that row, the weight is evenly distributed ensuring a comfortable and safe installation.
Depending on your goals, you could have 1-2 rows of hair installed to just add fullness to the current length of your natural hair. If you’re looking to add length and fullness, you could have 3-4 rows installed.
After your initial installation, you’ll have two types of maintenance appointments: “The Move Up Session” and “The Removal/Reinstall Session.” These can happen anywhere between 4-8 weeks apart. I’ve seen clients go a little longer than this but ultimately, it will be up to how fast your hair grows, what the goals are that we’re trying to achieve, and your personal comfort level.
The Move Up Session will simply involve us taking the silicone-lined beads and unclamping them, sliding them up to their original position (when they were originally installed), and then clamp them back closed. Because the beads are moved up, so is the weft of hair that is resting on them. This gets you back to your original position, and good as new!
After 2-3 Move Up Sessions, you’ll want to schedule a session called The Removal/Reinstall Session. At this session, we’ll take out your beads, releasing the weft from the hair. Then, we will reinstall a fresh row of beads and reinstall the hair that we just removed. This allows for a fresh application (after you’ve worn them for that full cycle, you’ll see why this is beneficial), and allows us to install the fresh rows on the hair near the original row, allowing the original hair to rest. This also helps us reassess how much your natural hair has grown, and if that impacts how many rows we install or if we need to change their location.
As far as the hair, there are two options: Machine Tied and Hand Tied.
The names are pretty straight forward…machine tied wefts are sewn by a machine, and hand tied wefts are (painstakingly) hand tied by a human, so you can imagine there’s going to be a little bit of difference in cost and finished look. The biggest difference you’ll see between the machine tied and the hand tied are density and how flat the base of the weft lays against the scalp. If you’ve got very fine hair, and especially if your hair is thinner on top, you may want to consider hand tied…simply because of how flat it’s going to lay against the scalp and how easy it will be to hide in your hair. For medium to thicker densities, you’ll be fine either way. It’s also possible to mix the two. You could install hand tied wefts in the top and/or bottom rows of the hair, and then machine tied on the middle and/or bottom rows.
If you’re interested in what this could look like for you, click HERE to schedule a no-pressure consultation. We’ll go over, in person, the entire process and I can show you examples of the hair for you to touch and see. After our consultation, I’ll send you a detailed email of what a maintenance schedule could look like for you, including all the costs involved, upfront. This will help you see what type of schedule this could look like for you and to see how this could fit into your budget. I know it sounds intimidating, but trust me when I say it may be more attainable than you think!
Machine Tied Wefts come in lengths: 14”, 16”, 18”, 20”, and 22”. Comes in 39 colors, starts at $135/pack and increases with added length. Installation is an additional cost. Typical installation requires 1-2 packs.
Hand Tied Wefts come in lengths: 14”, 16”, 18”, 20”, and 22”. Comes in 39 colors, starts at $150/pack and increases with added length. Installation is an additional cost. Typical installation requires 1-2 packs.
Click HERE to check out this video to see a really quick overview of what installation and maintenance appointments look like. Sarah Page is the hairdresser they’re showcasing and she is an educator that I love to follow for continued education on this method. You can check out her Instagram page HERE to see numerous applications she’s shown, it’s mesmerizing to watch!

If you’re interested in a no-pressure consultation to talk about how extensions could help you achieve your hair goals, click the link below: